Note: The actions in this post have taken place somewhere in 2022 and a step in the process leveraged an oversight in the Cassida Pro website which has since been fixed.
Introduction
This post will walk through the steps of hacking an embedded machine from A to Z in a nondestructive way, with any and all pitfalls that crossed my path. If you think I made a mistake or could’ve taken an easier route, please let me know and I will add it to the post.
Background
As a (former) supervisor at Makerspace Delft, I often got my hands on some high end trash. It’s located on the south side of Delft in an abandoned cable factory1 which has been repurposed for hobbyists and startups, although they want to revamp the entire place in the near future and turn it into a mixed purpose district which makes the future for these kinds of businesses uncertain. Anyhow, I will agree that the place is in need of a cleanup but its shadyness probably kickstarted the creation of this post.
Anyone who’s been to the Netherlands knows that cash is rarely used nowadays, except by the elderly and drug dealers. While I don’t want to point fingers at who this money counting machine may have belonged to, the fact that it was found closely following a drug bust in a run down factory may give some slight hints. I’ll leave the connecting of the dots as an exercise to the reader.
Why hack into it?
So near the back of the building in a dumpster we found this Cassida Zeus machine. A cursory google search gave us some hints that we were dealing with a money counter / verifier.
When plugging it in, it looked good to go, the screen lit up and everything. Between the 3 of us that took it out of the machine we had a single cash bill2 and put it in. After the motors almost tore the bill apart without counting we didn’t know what to do with it. Fixing it is an option, but unless one of us had aspirations in dealing either cards or drugs that wasn’t too useful.
I opted to take the machine and try to hack into it, it was my first time trying something like this but seemed like a fun challenge.
Examining the machine
So yeah, where do we even start?
What I did at first was look around the machine and see what capabilities it had. To get started I looked for a service manual, and came across one that suited my needs. Unfortunately this isn’t the exact service manual I initially found, so keen observers might see a glimpse of the “secret” test menu. I will get to my discovery of this document later.
Ah, interesting, the USB-B port can be used for a connection to the PC, but reading on we find that we need a specific API for communication. Unfortunately when trying around in PuTTy while enumerating baud rates, I found no way of getting a response of the machine so gave up.
Based on some poking and interfacing with some of the ports, I got none the wiser and opted to open up the machine and see whats inside.
Taking a look inside
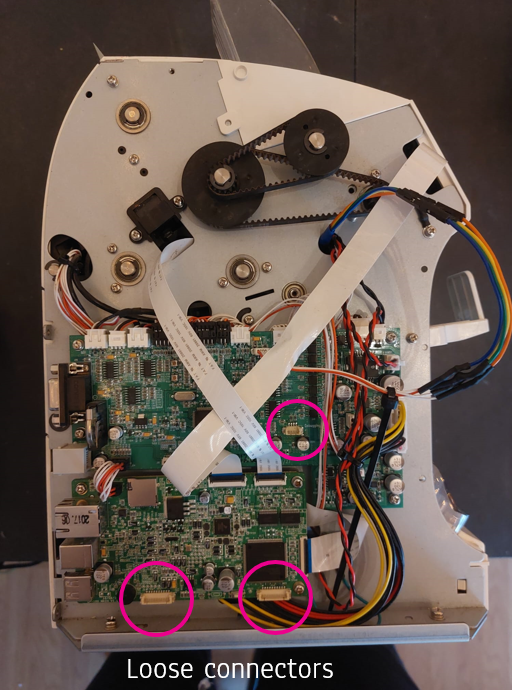
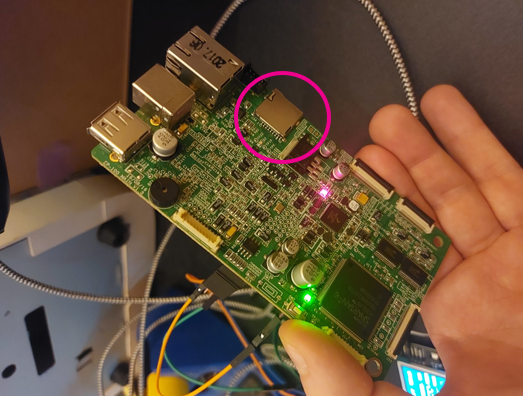
Opening it up, we can reveal a couple more interesting things. The first thing I noticed was a couple of unused ports not accessible from the outside, as well as a micro sd card slot.
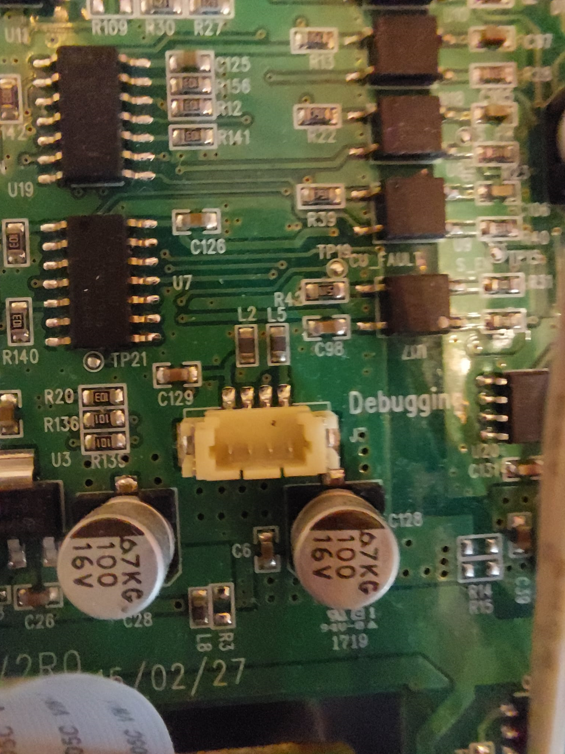
And most importantly, a 4 pin header labeled Debugging which is probably a UART connection.
| Ports | Hidden SD Card Slot | Debugging slot |
|---|---|---|
 |
 |
 |
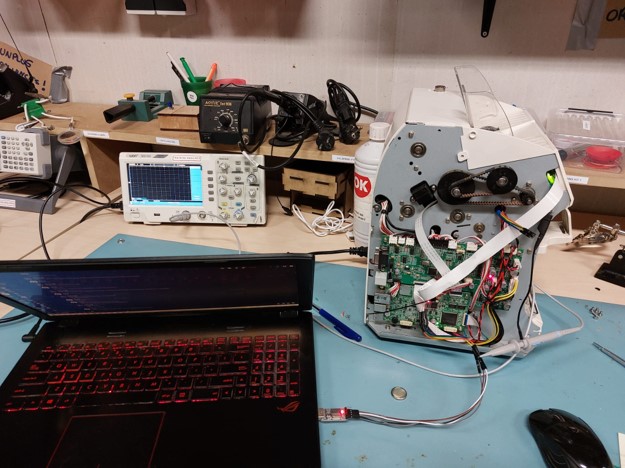
So lets just attach some wires and talk to it through PuTTy. I iterated baud rates but even with an oscilloscope I couldn’t see any response. So I gave up on this approach as well.
Looking for more information
Well, that brought us nowhere, so let’s look for some more information. The machine has a model number, so let’s look that up. The first result is the Cassida Pro website, which is the company that makes the machine.
Crawling the website
My first instinct was to look for a support page, which may have service manuals, firmware updates or other useful information. Unfortunately, I couldn’t find something by just browsing around so I used gobuster to crawl the website. I used the following command:
|
|
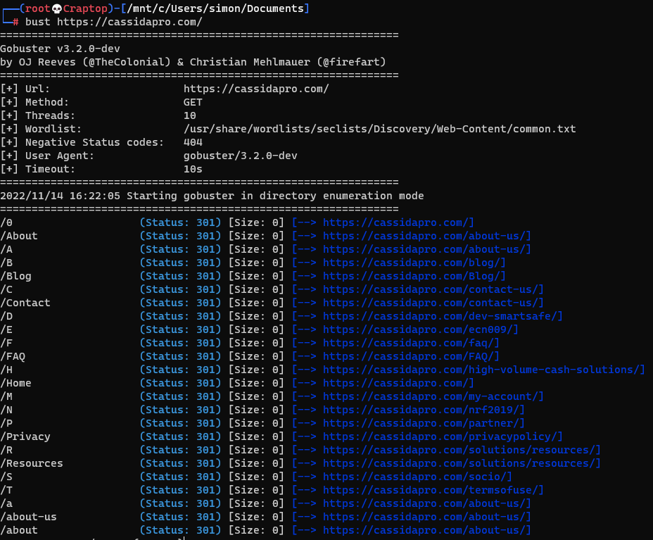
https://cassidapro.com/partner/ looks promising, so lets check it out.
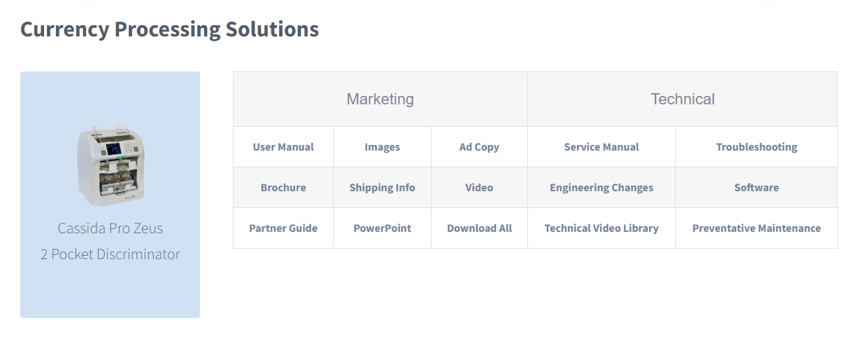
Well, there we go, a page with a bunch of links to manuals and firmware updates. Let’s just click on down…

Darn, it seemed too easy anyway. I’m glad to see “Mike Bodine” is on top of his game, completely thwarting any attempts to get some firmware updates.
“The Spanish Strategy"™
However… You may have also recognized another url in the gobuster output, namely https://cassidapro.com/socio/. This is the Spanish version of the website, and it seems that the Spanish version of the website is not as well maintained as the English version. So let’s check out the partner page there.

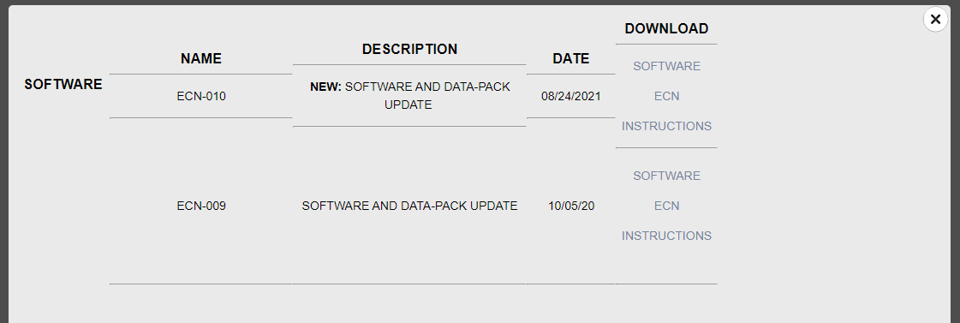
Bingo! Let’s download the firmware update and see what we can do with it. We are greeted with a file called 1_tbmupdate_cassida_usd_200630.tbk, I have no idea what a .tbk file is, but it’s probably just a zip file with a different extension3. So let’s just rename it to .zip and open it with 7zip.

Well, that’s a bummer. It seems that the firmware update is encrypted. Let’s see if we can decrypt it.
Decrypt the firmware update
To decrypt the zip file I looked at 2 main options:
- Brute forcing the password
- Exploiting weak zip encryption
Brute forcing
The first option is to brute force the password. This is a very simple approach, we just try a bunch of passwords until we find the right one. I opted to use hashcat for this, since it’s a very powerful tool for password cracking (although john probably works just as well). I used the following workflow4
$ cp 1_tbmupdate_cassida_usd_200630.tbk update.zip
$ zip2john update.zip > update.hash
$ cat update.hash
update.zip:$pkzip2$3*2*1*0*8*24*33fb*700e*82fbc48cd8fcbe5885e734727783acf77c9c3d96e165577a5f22f67294e18a1b6b6a4391*1*0*8*24*ee39*7009*2a96ee640e56ecaccf86814fcab6573d4183016e5a042bb48615092304c8369131a42519*2*0*21*15*6b5dbfbd*9d119e7*70*0*21*6b5d*7d44*7691f6a82ce08dc64bd85e7dc7a48e6ed281371f2f207b50322ff94ff90184f66c*$/pkzip2$::update.zip:update/rc.local, update/callemergency...
To use it in hashcat we can remove a bunch of the information and just keep the hash:
$ cat only_hash.hash
$pkzip2$3*2*1*0*8*24*33fb*700e*82fbc48cd8fcbe5885e734727783acf77c9c3d96e165577a5f22f67294e18a1b6b6a4391*1*0*8*24*ee39*7009*2a96ee640e56ecaccf86814fcab6573d4183016e5a042bb48615092304c8369131a42519*2*0*21*15*6b5dbfbd*9d119e7*70*0*21*6b5d*7d44*7691f6a82ce08dc64bd85e7dc7a48e6ed281371f2f207b50322ff94ff90184f66c*$/pkzip2$
There are multiple hash modes for zip files, but the one we want is 17225.
17200 | PKZIP (Compressed)                               | Archives
17220 | PKZIP (Compressed Multi-File)                    | Archives
17225 | PKZIP (Mixed Multi-File)                         | Archives
17230 | PKZIP (Mixed Multi-File Checksum-Only)           | Archives
17210 | PKZIP (Uncompressed)                             | Archives
20500 | PKZIP Master Key                                 | Archives
20510 | PKZIP Master Key (6 byte optimization)           | Archives
Then we just run hashcat with a simple bruteforce attack, as we don’t know anything about the format of the password. So we just try all possible combinations from 1 to 10 printable ascii characters.
$ hashcat -m 17225 only_hash.hash -a 3 ?a?a?a?a?a?a?a?a?a?a ‐‐increment
After a couple of hours, I only managed to get up to 8 characters5. Not knowing anything about the length of the password, I decided to give up on this approach.
Exploiting weak zip encryption
Looking back at the image we see that the files are encrypted with ZipCrypto which is a legacy cryptography algorithm vulnerable to a partial known plaintext attack. Luckily a tool called bkcrack can already exploit this6. The tool requires 12 bytes of known plaintext, which we may be able to find in the firmware update.
Unfortunately, none of the files in there were findable on google, so we don’t have a complete plaintext to use for the attack. However we can guess that the first 12 bytes of the rc.local file are likely #!/bin/sh\n:
| 1 | 2 | 3 | 4 | 5 | 6 | 7 | 8 | 9 | 10 | 11 | 12 |
|---|---|---|---|---|---|---|---|---|---|---|---|
# |
! |
/ |
b |
i |
n |
/ |
s |
h |
\n |
? |
? |
Which leaves us with 2 character to bruteforce but we can guess that it very likely might be # and \n or a spacenar. However, I got stopped right in my tracks when I looked back at the 7zip window and saw that the rc.local file wasn’t just encrypted, it was also compressed with the DEFLATE algorithm.
So the “plaintext” that got encrypted isn’t actually the plaintext, but the compressed plaintext. I don’t know how deflate works but since the initial approach already relied on guessing 2 bytes out of 12, trying to guess it after it’s been compressed is probably not going to work. So I gave up on this approach as well.
Another stupid approach
There was another interesting file in the zip file: currency.list. This file is 21 bytes long (so at least the 12 we need) and probably contains a list of currencies. Additionally it has an CRC32 checksum, so once we found a plaintext that matches the checksum we can be reasonably sure that we found the right plaintext. Bruteforcing 21 characters is a bit too much, but we can make reasonable assumptions about the format of the file.
Perhaps it’s a list of 3 letter currency codes? For instance:
[EUR,USD,GBP,JPY,RBL]
These all lined up to the 21 bytes we need, so I made a dictionary of all the 3 letter currency codes and generated CRC32 checksums for all of them and looked for a match. And we got a match! Wait actually we got a couple… too many actually.
Through the pigeonhole principle we can see that there are multiple 3 letter strings that map to the same CRC32 checksum. There are only 2^32 possible CRC32 checksums, but there are 180^57 possible lists of 3 letter currency codes. Which means we expect roughly…
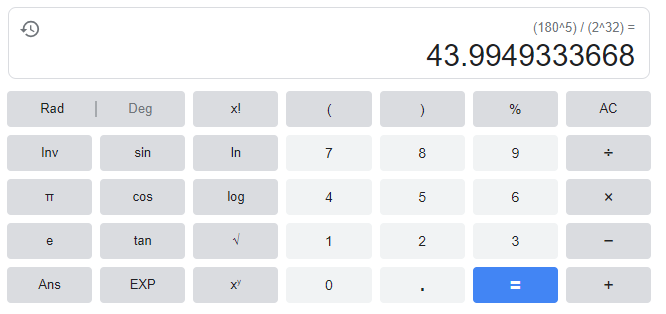
… a bit too many matches, and this is just for a guess that the file is a list of 3 letter currency codes in that exact format, maybe it uses regular brackets, or spaces instead of commas, maybe a different capitalization even. Not even mentioning the fact that after a match we need to brute force different settings for the deflate algorithm. And then use the time-intensive decryption script to see if it’s the right one. So I gave up on this approach as well.
(Fun fact, the actual file is just some ascii numbers with some whitespace sprinkled in, so it’s not even a list of currencies)
Finding the key
Well, the firmware update file has to be decrypted somewhere right? Unfortunately that place is in the machine itself, so we have to find a way to read it out. Let’s start by looking at the board again and looking for some interesting chips.
Where is it?
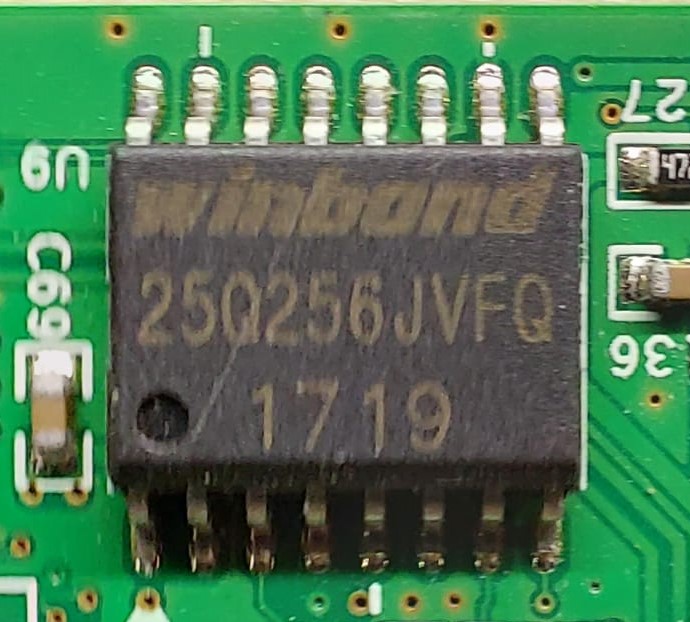
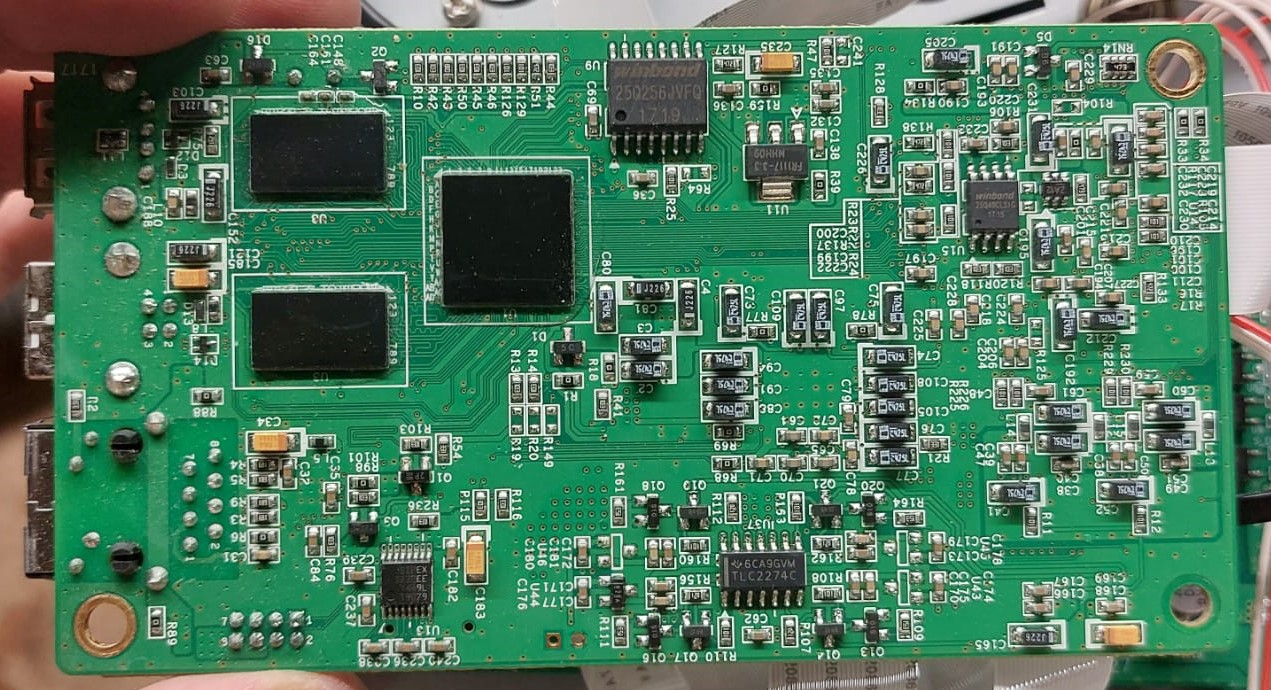 Flipping over the board reveals a bunch of additional chips, and we can see a familiar sight. We can make an educated guess that the large black chip in the middle is the CPU and the two smaller chips to the left are the RAM chips. However the last chip is what we are looking for, the W25Q256JVFQ flash chip. 8 We can follow the standard flash memory naming convention to figure out that this is a 256Mbit flash chip, which means it has 32MB of storage.
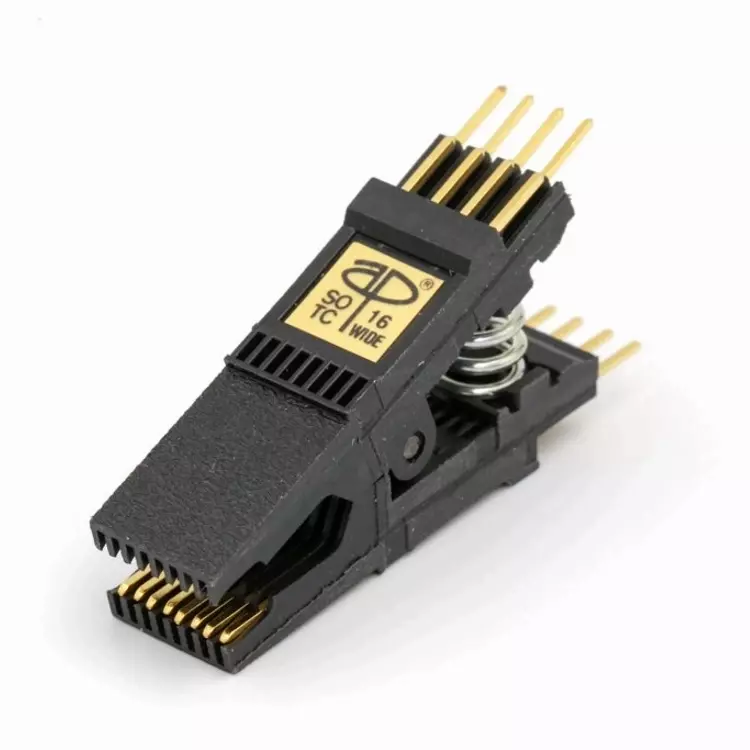
As I am a terrible solderer, I wanted to avoid desoldering the chip at all costs. So looked into a way to read it out without removing it from the board. Looking at the flash chip, we can see that it is attached to the board with reasonably large pins9, which means that we can probably get away with just connecting some wires to it and reading it out. To connect the wires I used an IC test clip, which made the task of attaching wires very simple10.
Talking to the chip
Since I have a SPI flash reader, I assumed I could just connect the power and data pins to the chip and read it out. According to the datasheet of the chip, the specs and pinout are as follows:
Here we see enough information to get started, we can see that the chip is powered by 3.3V, supports SPI (which is what we will use to talk to it), and has a maximum clock speed of 133MHz. Even though the chip has 16 pins, we only need to connect 6 of them to get started. The pins we need to connect are:
| Pin | Name | Description |
|---|---|---|
| 1 | /CS | Chip select, this is used to select the chip we want to talk to. |
| 2 | DO (MISO) | Data out, this is the data that the chip sends to us. |
| 3 | GND | Ground, this is the ground pin. |
| 4 | DI (MOSI) | Data in, this is the data that we send to the chip. |
| 5 | CLK | Clock, this is the clock signal that we use to synchronize the data transfer. |
| 6 | VCC | Power, this is the power pin. |
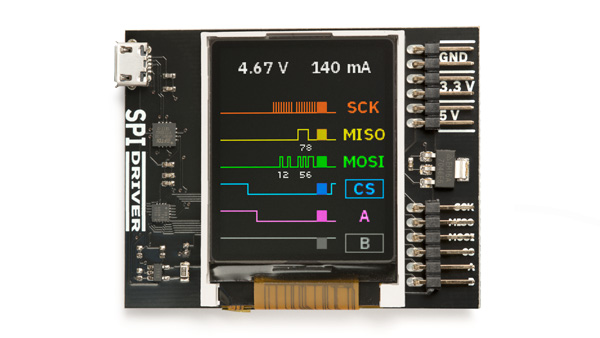
I used a SPIDriver11 to connect to the chip, but any SPI flash reader should work.
Let’s get cooking and send the “Quick start” request to read the ID of the chip:
|
|
We expect to get the the same ID of the chip three times, so what do we get?
|
|
Hmmmmmm…. That’s really strange. The likely explanation is that this technique doesn’t work because the chip is still attached to the PCB, this means that our SPIDriver is also powering the rest of the board, so we are talking to the chip at the same time as the CPU is. This means that we are getting some garbage data back.
- A possible fix for this is pulling the reset pin of the CPU low, which should stop it from interfering with our communication. However, as someone who is terrible at soldering, lets not even attempt to deal with the even smaller pins on the CPU.
- Another probably even smarter fix in hindsight is to just wait for the CPU to boot up and then read the flash chip and go to idle, and then talk during the downtime. However, I didn’t think of this at the time.
Eavesdropping
Lets use the lesson learned from trying to talk to it directly and try to eavesdrop on the communication between the CPU and the flash chip. We we’re already accidentally doing that anyway. To do this we keep the same setup as before and switch out the SPIDriver for a logic analyzer.12 This allows us to see the communication between the CPU and the flash chip. We also switch from a python script to PulseView, which is a tool for analyzing logic analyzer data. Also I needed the board to boot normally, so I had to attack all the wires back to the board and then boot. This is what the setup looks like:
We’re reading some bits going up and down, so that’s good. But it looks a bit scrambled. We’re expecting a clear clock signal to delineate the bytes,13 but we are seeing no such thing. We see a regular-ish pattern on the 4th channel but it’s switching slower than the clock speed we expect. My hypothesis was that we are sampling too slow, which is why we are getting a mangled clock speed. There’s probably some very clever math to figure out what the real clock speed is, but I’m not that clever. So I just tried to sample faster.
The logic analyzer I have can sample at 24MHz, which is a lot lower than the maximal rate of 133MHz the chip supports. So I had to put up some money and buy a better logic analyzer. I bought a Kingst LA1010,14 which can sample at 100MHz (at 3 channels, but we just sample DI, DO and CLK), and also switched to KingstVIS15. This is what the setup looks like now:
Now that looks amazing!
Reconstructing the flash chip
Now that we have a captured SPI conversation from boot all the way to the firmware update menu, the encryption key probably has been copied from the flash chip to the CPU at some point. So we simply take all bytes that the flash chip has sent to the CPU and concatenate them together and save it to a file. I wrote a simple parser that used an exported csv from KingstVIS and only looked at the DO line. Unfortunately that script is lost to time. Lets call this file result.bin.
And we can already see some interesting stuff. How about we do something simple and just look for a string related to the firmware update, such as zip?
And there we are, the password falls right into our lap. The -P argument to unzip takes in the decryption password and we can now just read it out and use it. 16
Note: The unzip command actually still works with an unencrypted file even if a password is provided. So in theory you could skip the whole password finding step and just zip a blind
rc.localfile without a password and hope for the best. However, I wanted to do it the proper way.
Making a backdoor
Now that we have the password, we can modify our own firmware update and use it to patch the machine, so that we can get a shell on it. We can take a look at the files and look for a good place to put our backdoor.
rc.local looks like a prime candidate, this is a superuser startup script17 so will run some POSIX shell code on startup of the device. It looks like this:
|
|
While this looked a bit too easy to be true, I just added a couple of lines to the end of the file:
|
|
The sleep was added since the network driver needed some time to start up. The second line is a reverse shell that connects to my host on port 4444, I just selected a simple one from revshells.com. I could’ve been fancy with a bind shell which should be easier to deploy to other machines as well, but just used a revshell for simplicity.
Putting it all together
So now we save the modified firmware file and zip it back up together using the password we found earlier and rename it to a .tbk file. Then I just put it on a USB stick and plugged it into the machine. I then went to the firmware update menu and selected the file. I started up a simple listener on my host with ncat -nvlp 4444. After updating the machine then rebooted, which triggered the execution of my modified rc.local file. I then waited patiently. After realizing that a minute feels really long when anticipating an uncertain outcome something popped up on my listener:
Some specs:
|
|
Conclusion
Future work
This was a fun project, but only exposes an exploit that requires hands on access to the machine. It would be interesting to see if we can find a way to exploit the machine remotely. We’d need to reverse engineer the running programs and see if we can find any vulnerabilities in them.
I’m currently not planning on doing this, but if you want to take a stab at it, feel free to contact me and I’ll give you some information on how to get started.
-
Which shows the usefulness of such a machine in the Netherlands ↩︎
-
Usually nobody wants to bother with making their own file format, so they just use a standard one and change the extension. Microsoft for example does this with their
.docxand.xlsxfiles. ↩︎ -
Adapted from https://ctftime.org/writeup/28193, the hash used is theirs. ↩︎
-
In hindsight, leaving it for a couple hours longer would’ve broken it. ↩︎
-
Based on this list. ↩︎
-
Compared to the other chips on the board, they’re still tiny and fiddly to work with ↩︎
-
I believe my logic analyzer came with a license for KingstVIS ↩︎
-
For obvious reasons I’m not going to post the password here. ↩︎
